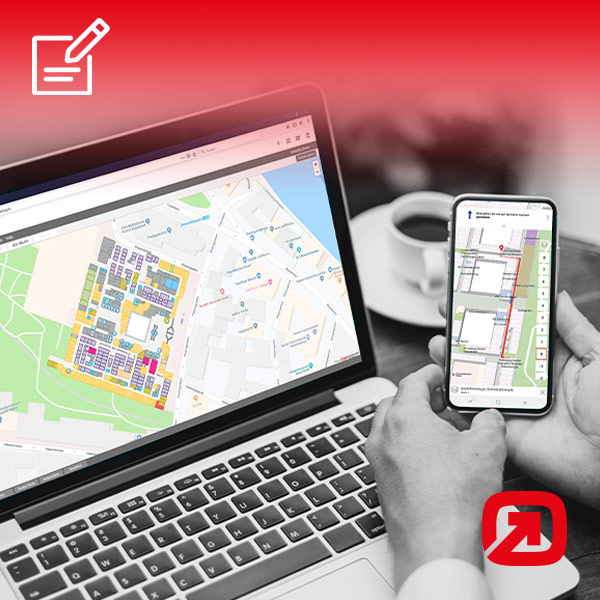
As the Internet of Things has gained popularity, indoor navigation systems have become increasingly important too. The most popular approach for indoor wayfinding is deploying systems based on Bluetooth Low Energy (BLE) beacons.
You are planning to implement an indoor navigation project with beacons, but are not sure which steps are necessary? We take you on a short tour and show you how to successfully set up your indoor navigation step by step.
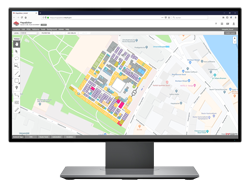
STEP 1: DIGITIZATION
The building plans are uploaded and adapted using the infsoft Maps Editor. Building outlines, rooms, POIs (Points of Interest) and contextual pathway-relations can be defined.
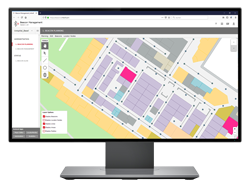
STEP 2: PLANNING
The number and locations of beacons are planned using the infsoft Beacon Management. Users can set installation points and have the possibility to display the transmission radius for each beacon. As a basic rule, the beacons should be placed approximately every six to nine meters.
The determined number of required beacons can now be ordered from a beacon hardware supplier. infsoft does not produce beacons itself, but we are happy to put you in contact with corresponding providers. During the ordering process, the desired transmission interval and transmission power level are selected.
In order to prepare the later calibration process, calibration routes are set up using the infsoft Calibration Tools. An important safety measure ensuring that the correct beacons are assigned to the system is to set the proximity UUID, a special type of identifier. In addition, a scan interval is selected that describes how often the calibration app will scan for the beacons (value between 350 and 1000 milliseconds).
STEP 3: INSTALLATION
The beacons are installed in the building in accordance with the planning. Ideally, they should be mounted on the ceiling. If the ceiling height exceeds 3.50 metres, we recommend placing them on the walls. You should also be aware that certain materials (e.g. concrete, metal, bulletproof glass) may interfere with Bluetooth signals. Make sure the beacons are mounted on a level, clean surface so that they will not come off later.
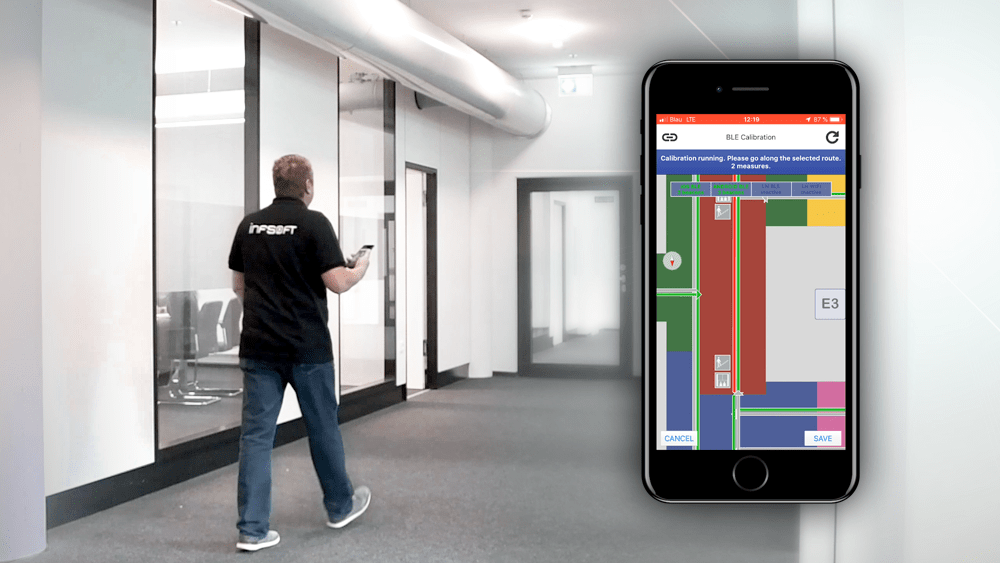
STEP 4: CALIBRATION
The infsoft Calibration App is used to calibrate the system. The calibration routes defined in step 2 are walked at a leisurely, constant speed. Also, make sure not to carry a beacon with you (e.g. in your trouser pocket) as this would falsify calibration.

STEP 5: EVALUATION
The infsoft Calibration Tools allow checking the calibration data, identifying areas with insufficient signal coverage and making adjustments if necessary.
STEP 6: PUBLISHING
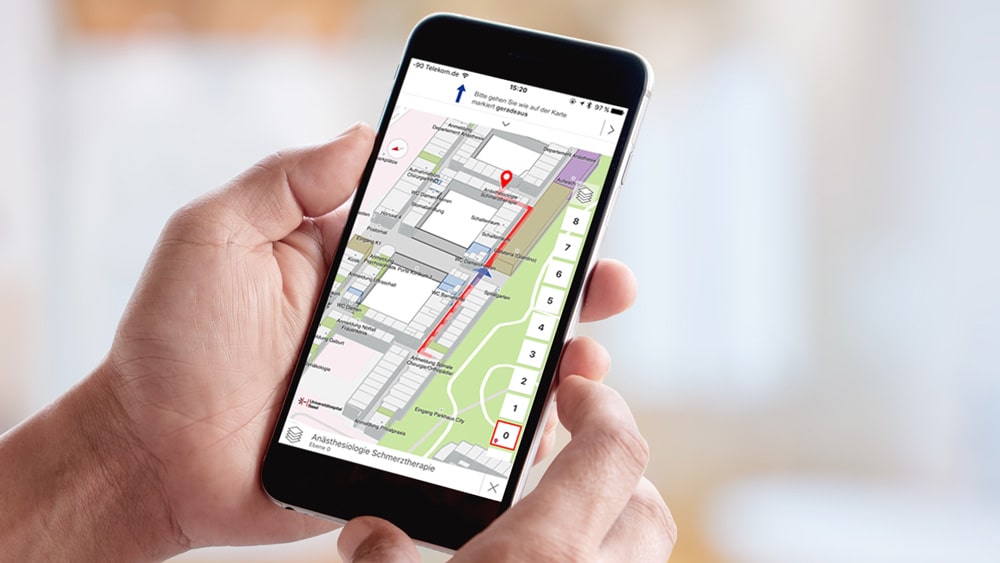
The last step enables to release the calibration data for the app. The application is needed in order to detect beacons in proximity of the mobile device and to calculate and display the position on the device. In addition, the app can be used for proximity marketing such as receiving targeted push notifications. The app is developed by infsoft in close cooperation with the customer. Alternatively, an infsoft SDK (Software Development Kit) can be installed for integration into an existing app.
After publication of the calibration data, all that is left to do is to store the location ID and the API key in the app.
Changes to the navigation system are possible at any time using the infsoft setup tools. The battery status of the beacons can be monitored via the Beacon Management Tool.
Are you planning to implement an indoor navigation project? Don’t hesitate to contact us, we will be happy to advise you.


